You've Reached the Center of the Internet
It's a blog
Bench
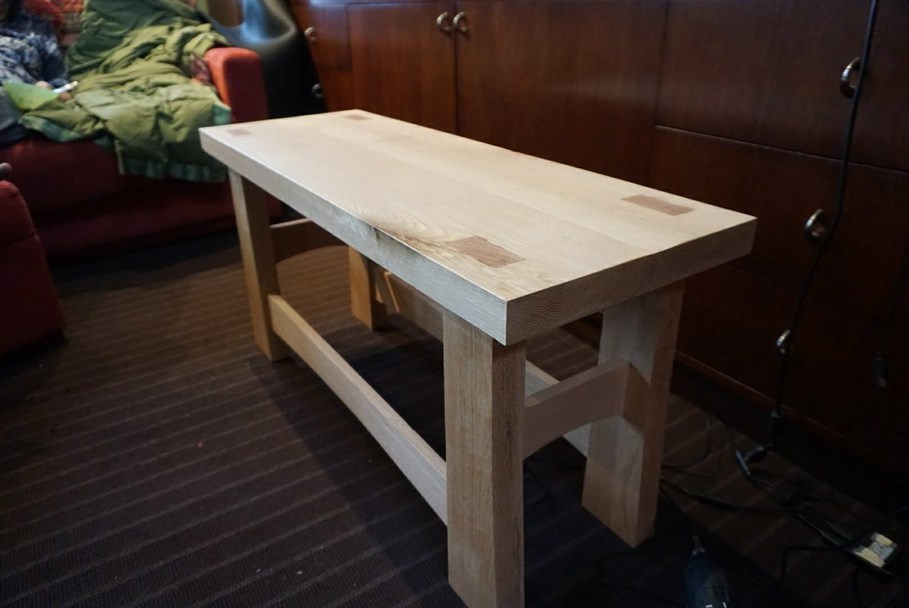
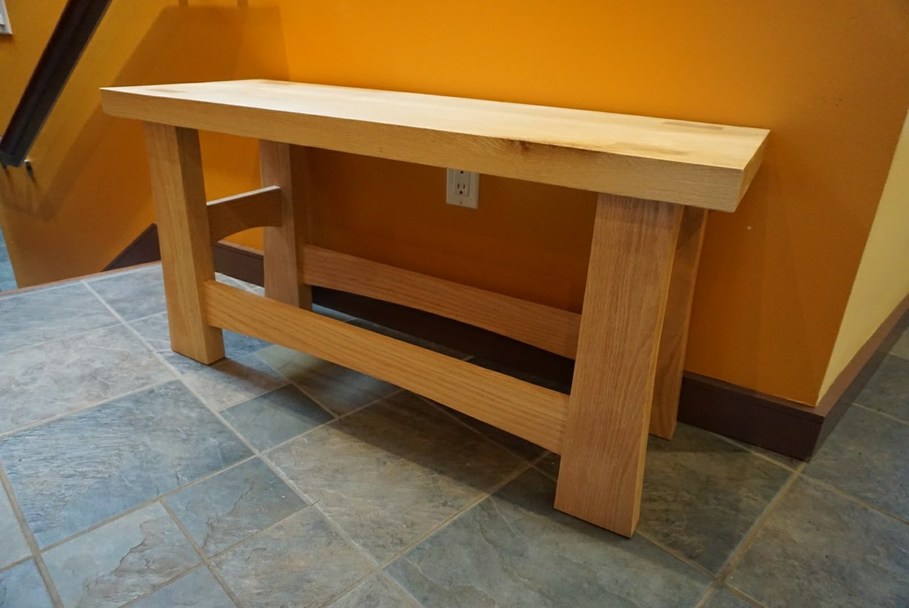
Matt and I made a fancy new bench out of red oak. In case you can't tell it has subtly curved legs and stretchers, with mortice and tenon joints connecting them. The legs attach to the top with some neato through-tenons, exposing the end grain of the wood.
The design was based on images from this Wood Wisperer post. Below are some adapted plans, with the dimensions we ended up using.
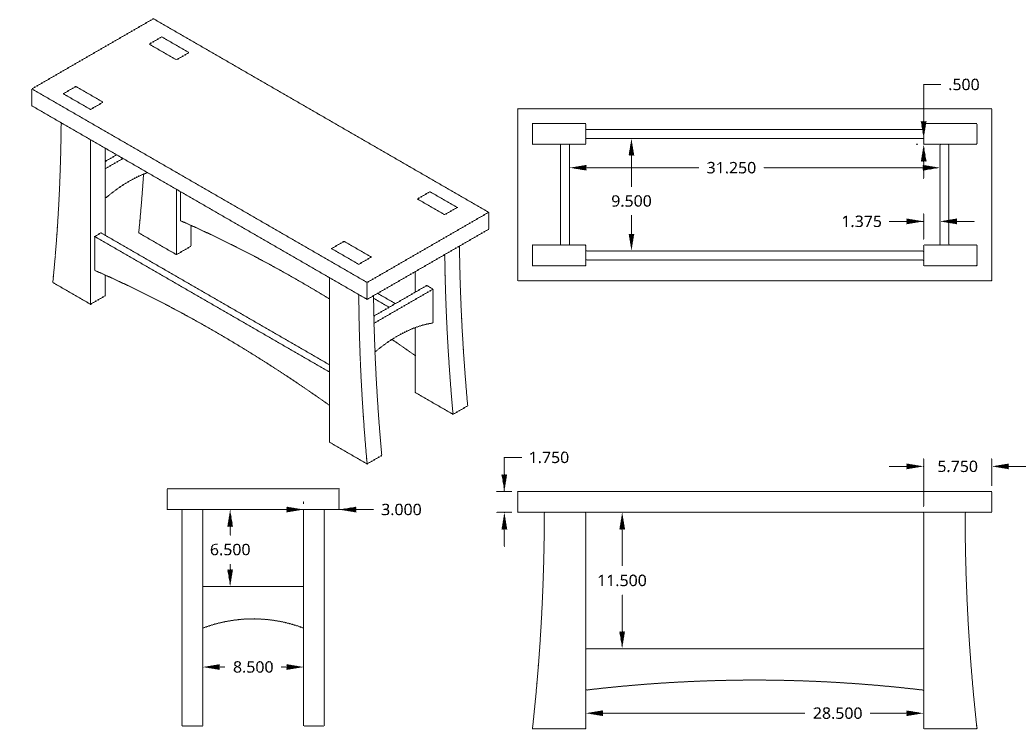
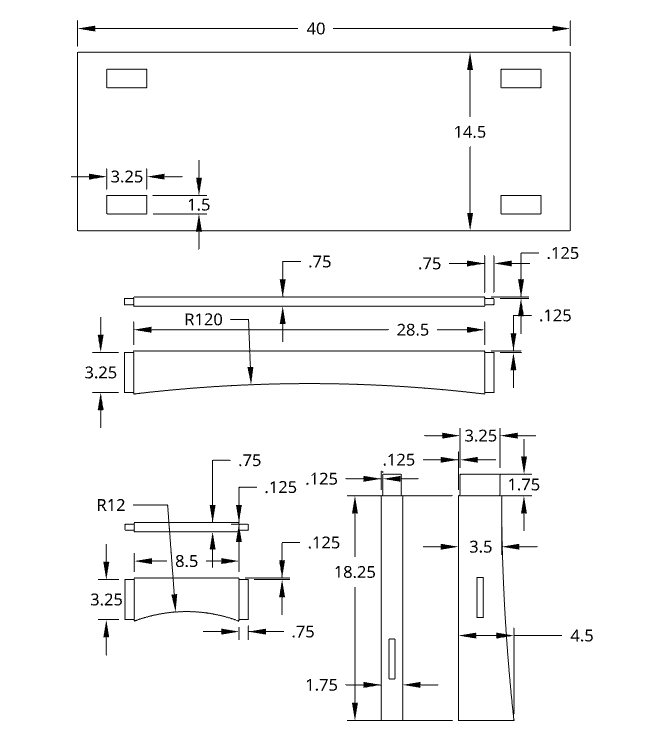
Here are some plans of the individual pieces: the seat, the two long stretchers, the two short stretchers, and the four legs. All the parts except for the seat have gentle curves cut into one edge.
We started by making the seat. We edge joined two 40" pieces of 2x8" red oak. We read that you need a jointer to make edge joining work. It would probably help, but we just glued together the factory edges from the lumber yard. There was a visable glue seam in some places, but it was good enough for us.
Speaking of the lumber yard, we went to L. Sweet Lumber in Providence. They were helpful and the wood was beautiful.
Next, we cut the legs and stretchers to length. The legs were made from 2x6" and the stretchers from 1x4".
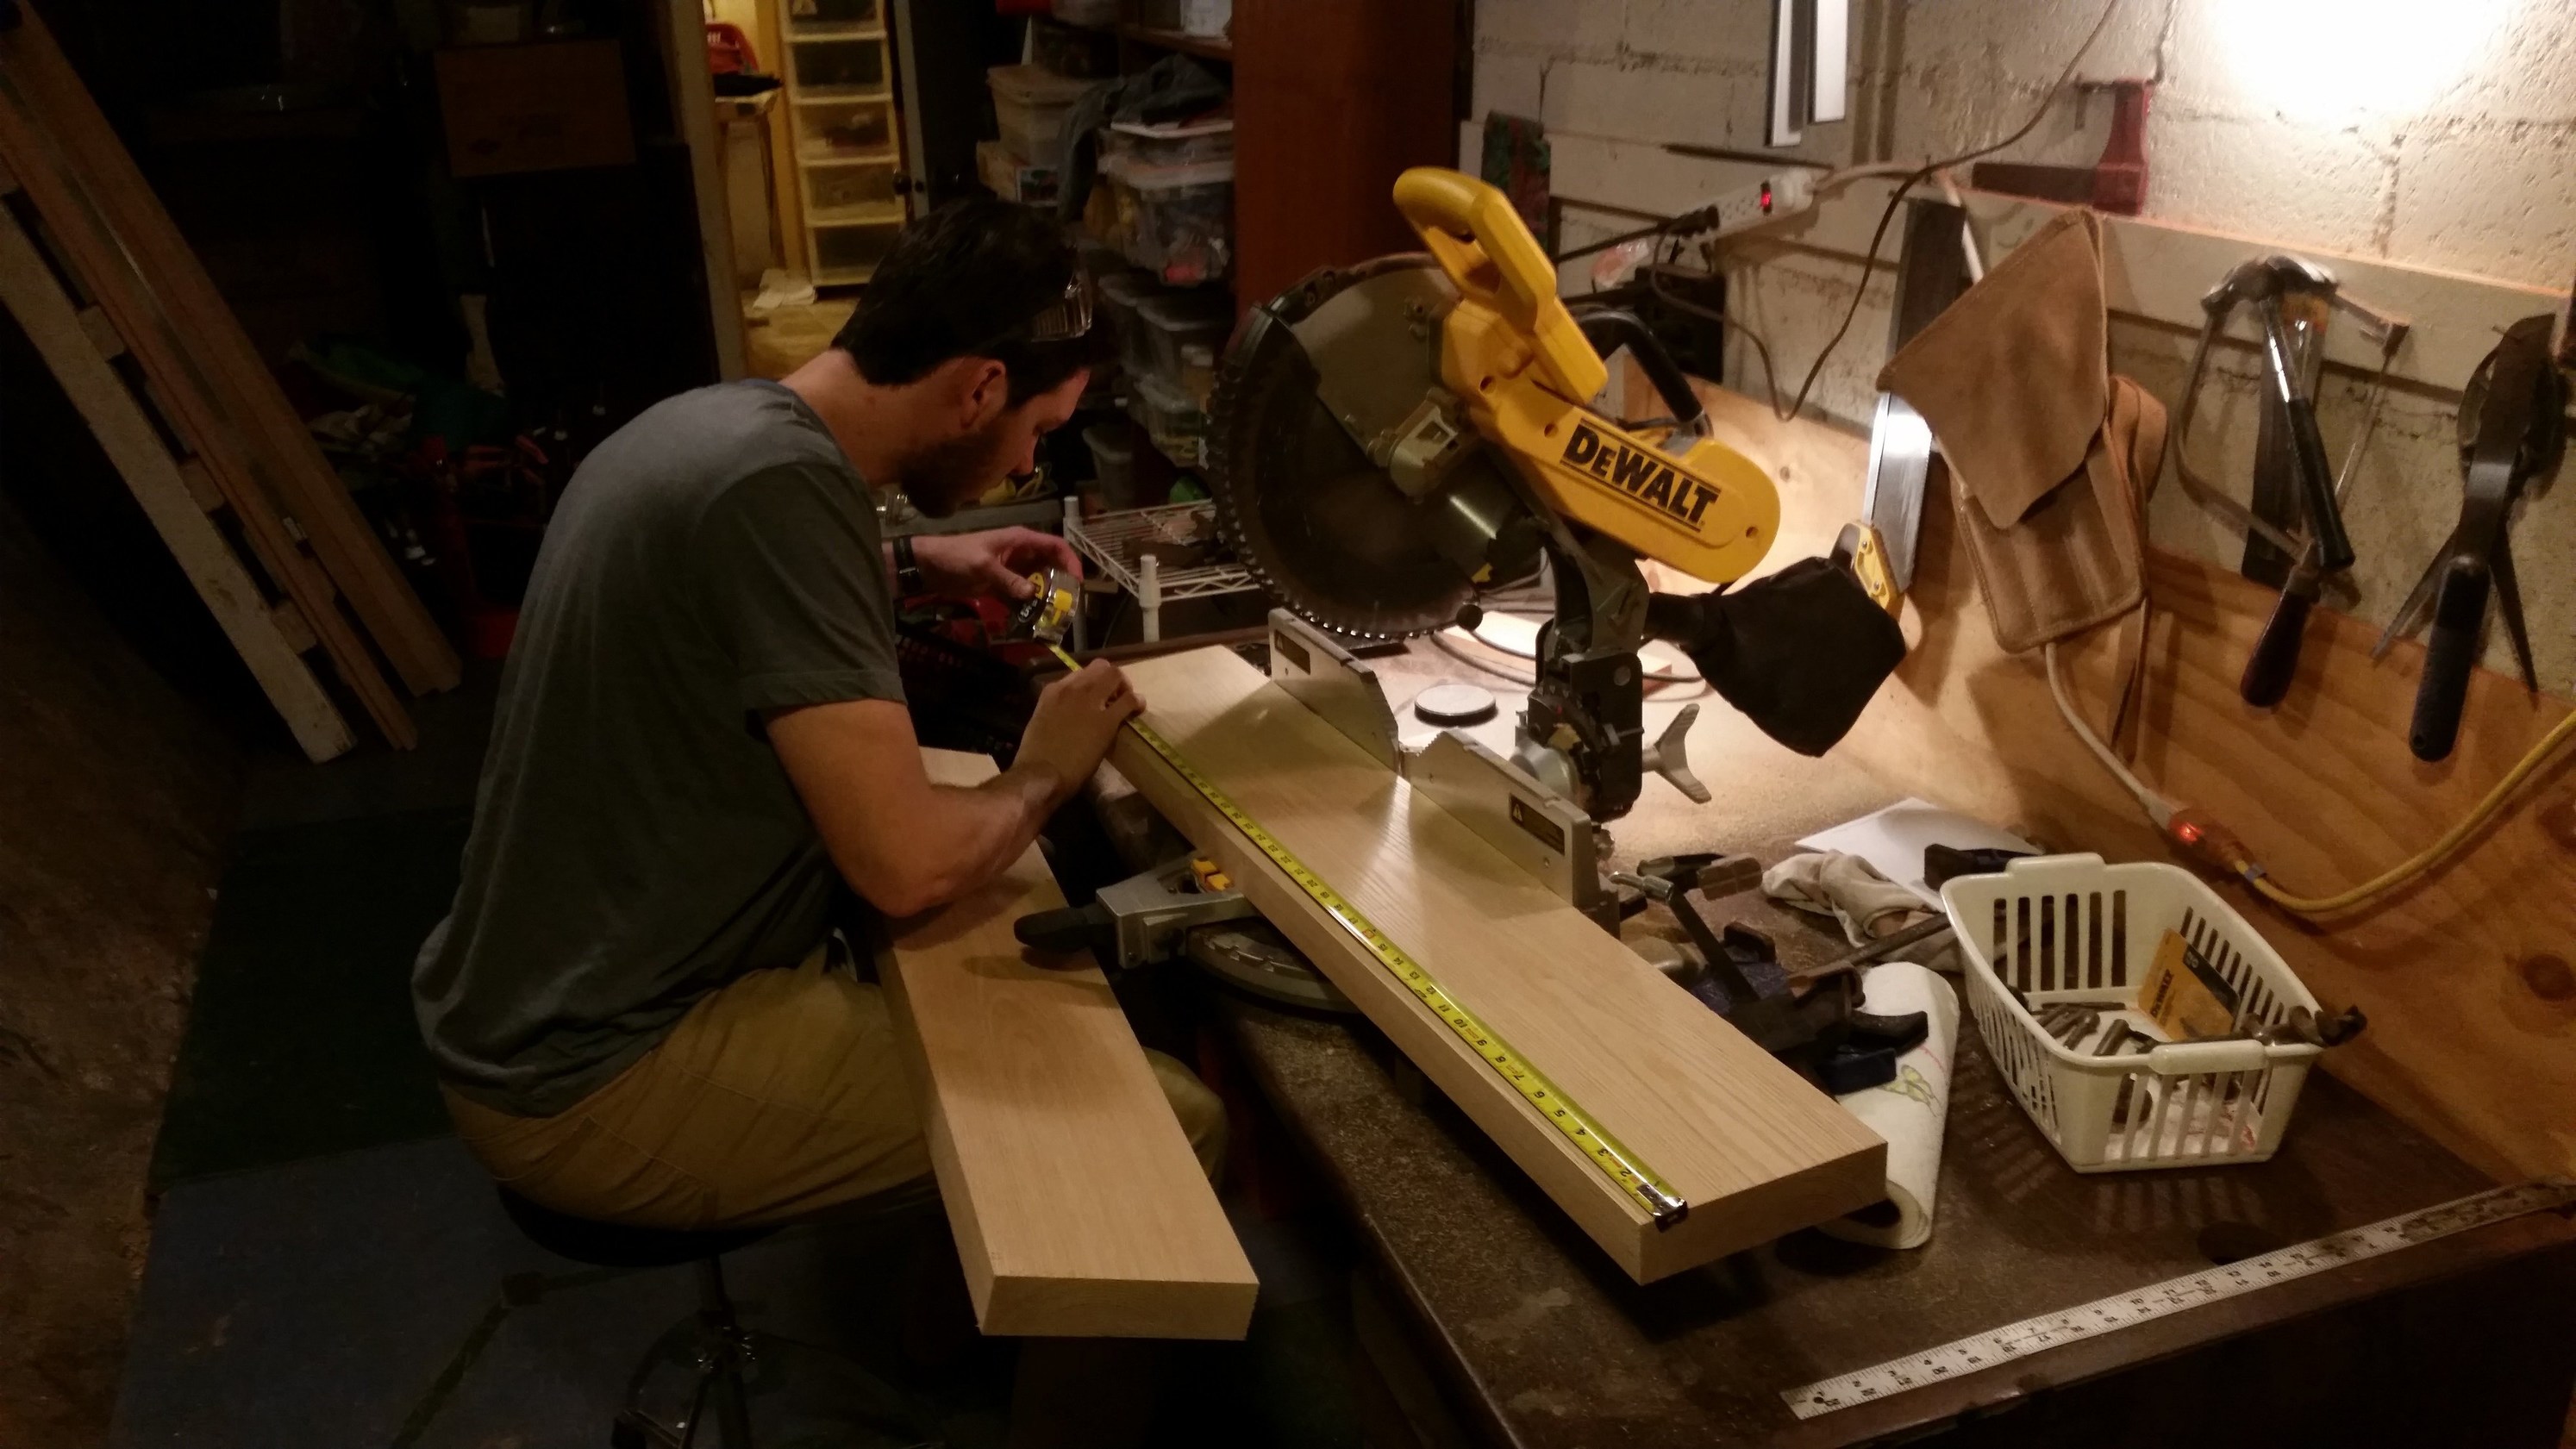
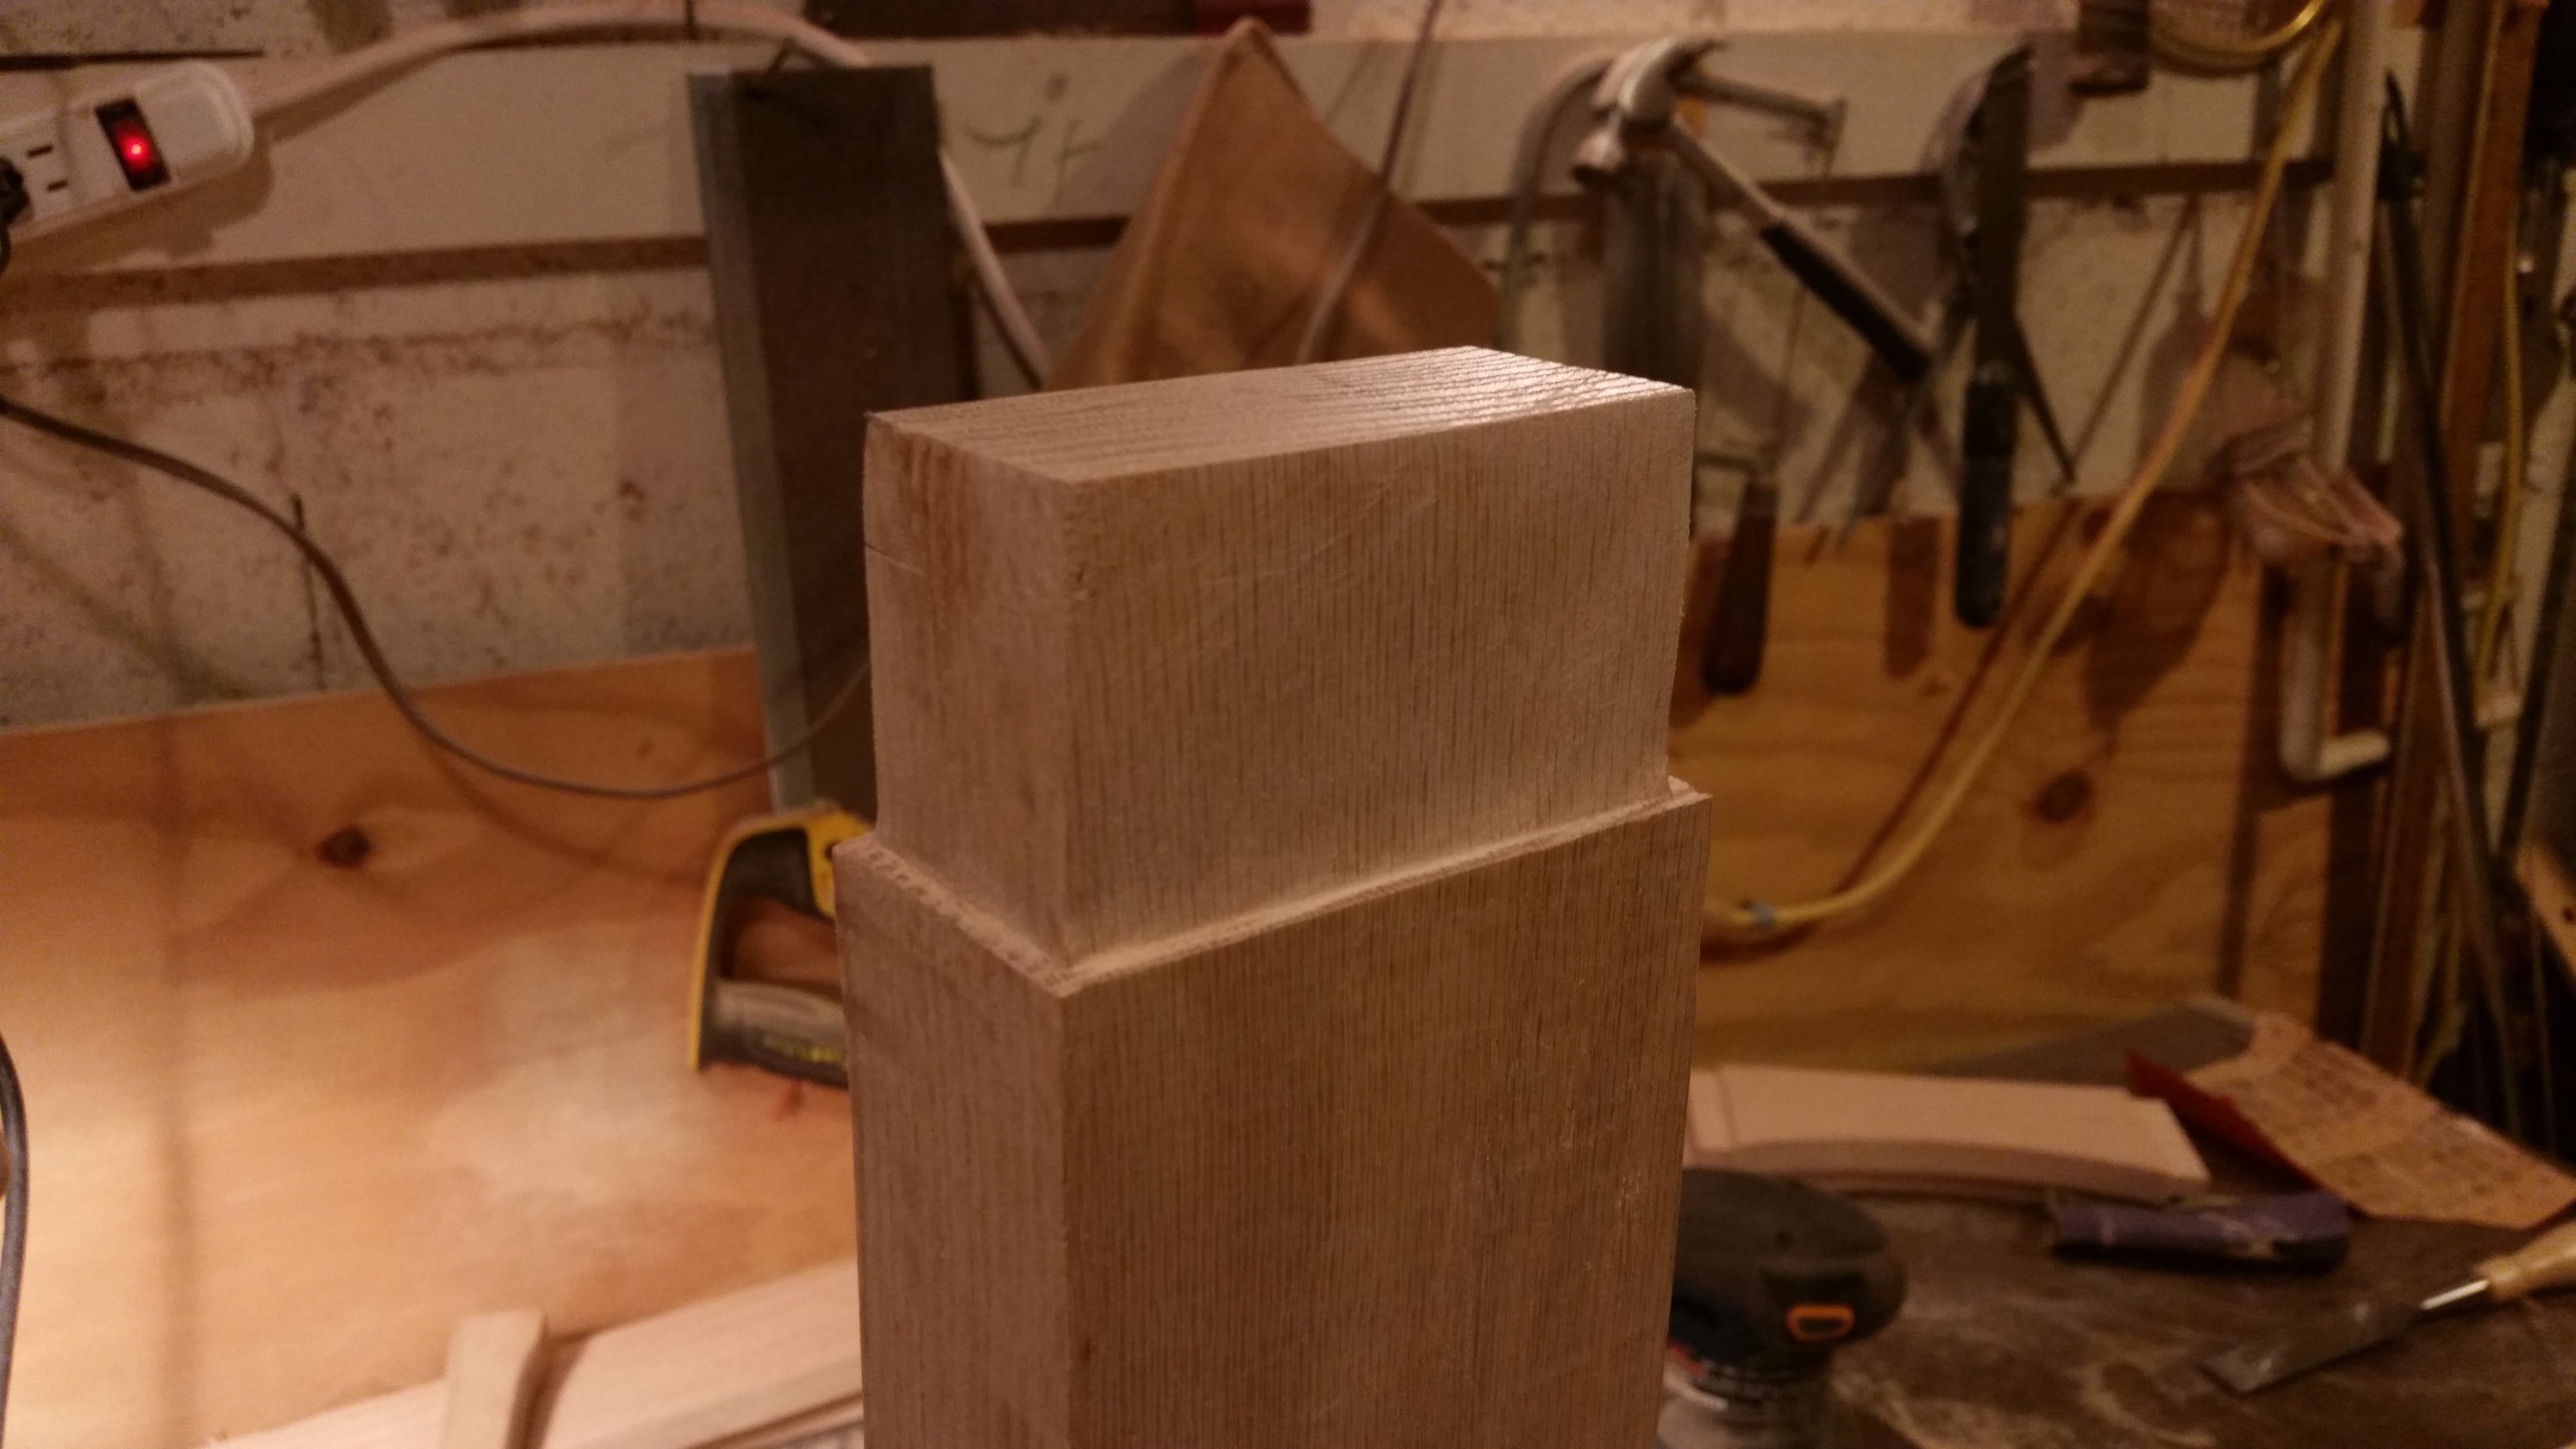
Next, we cut the mortices. We decided to go with uniform 1/8" shoulders for all of our tenons. This left us with ~1/2" wide mortices for the stretchers and ~1 1/2" for the legs. We used Phil's drill press with some forstner bits to remove most of the wood, then finished the mortices with the chisels.
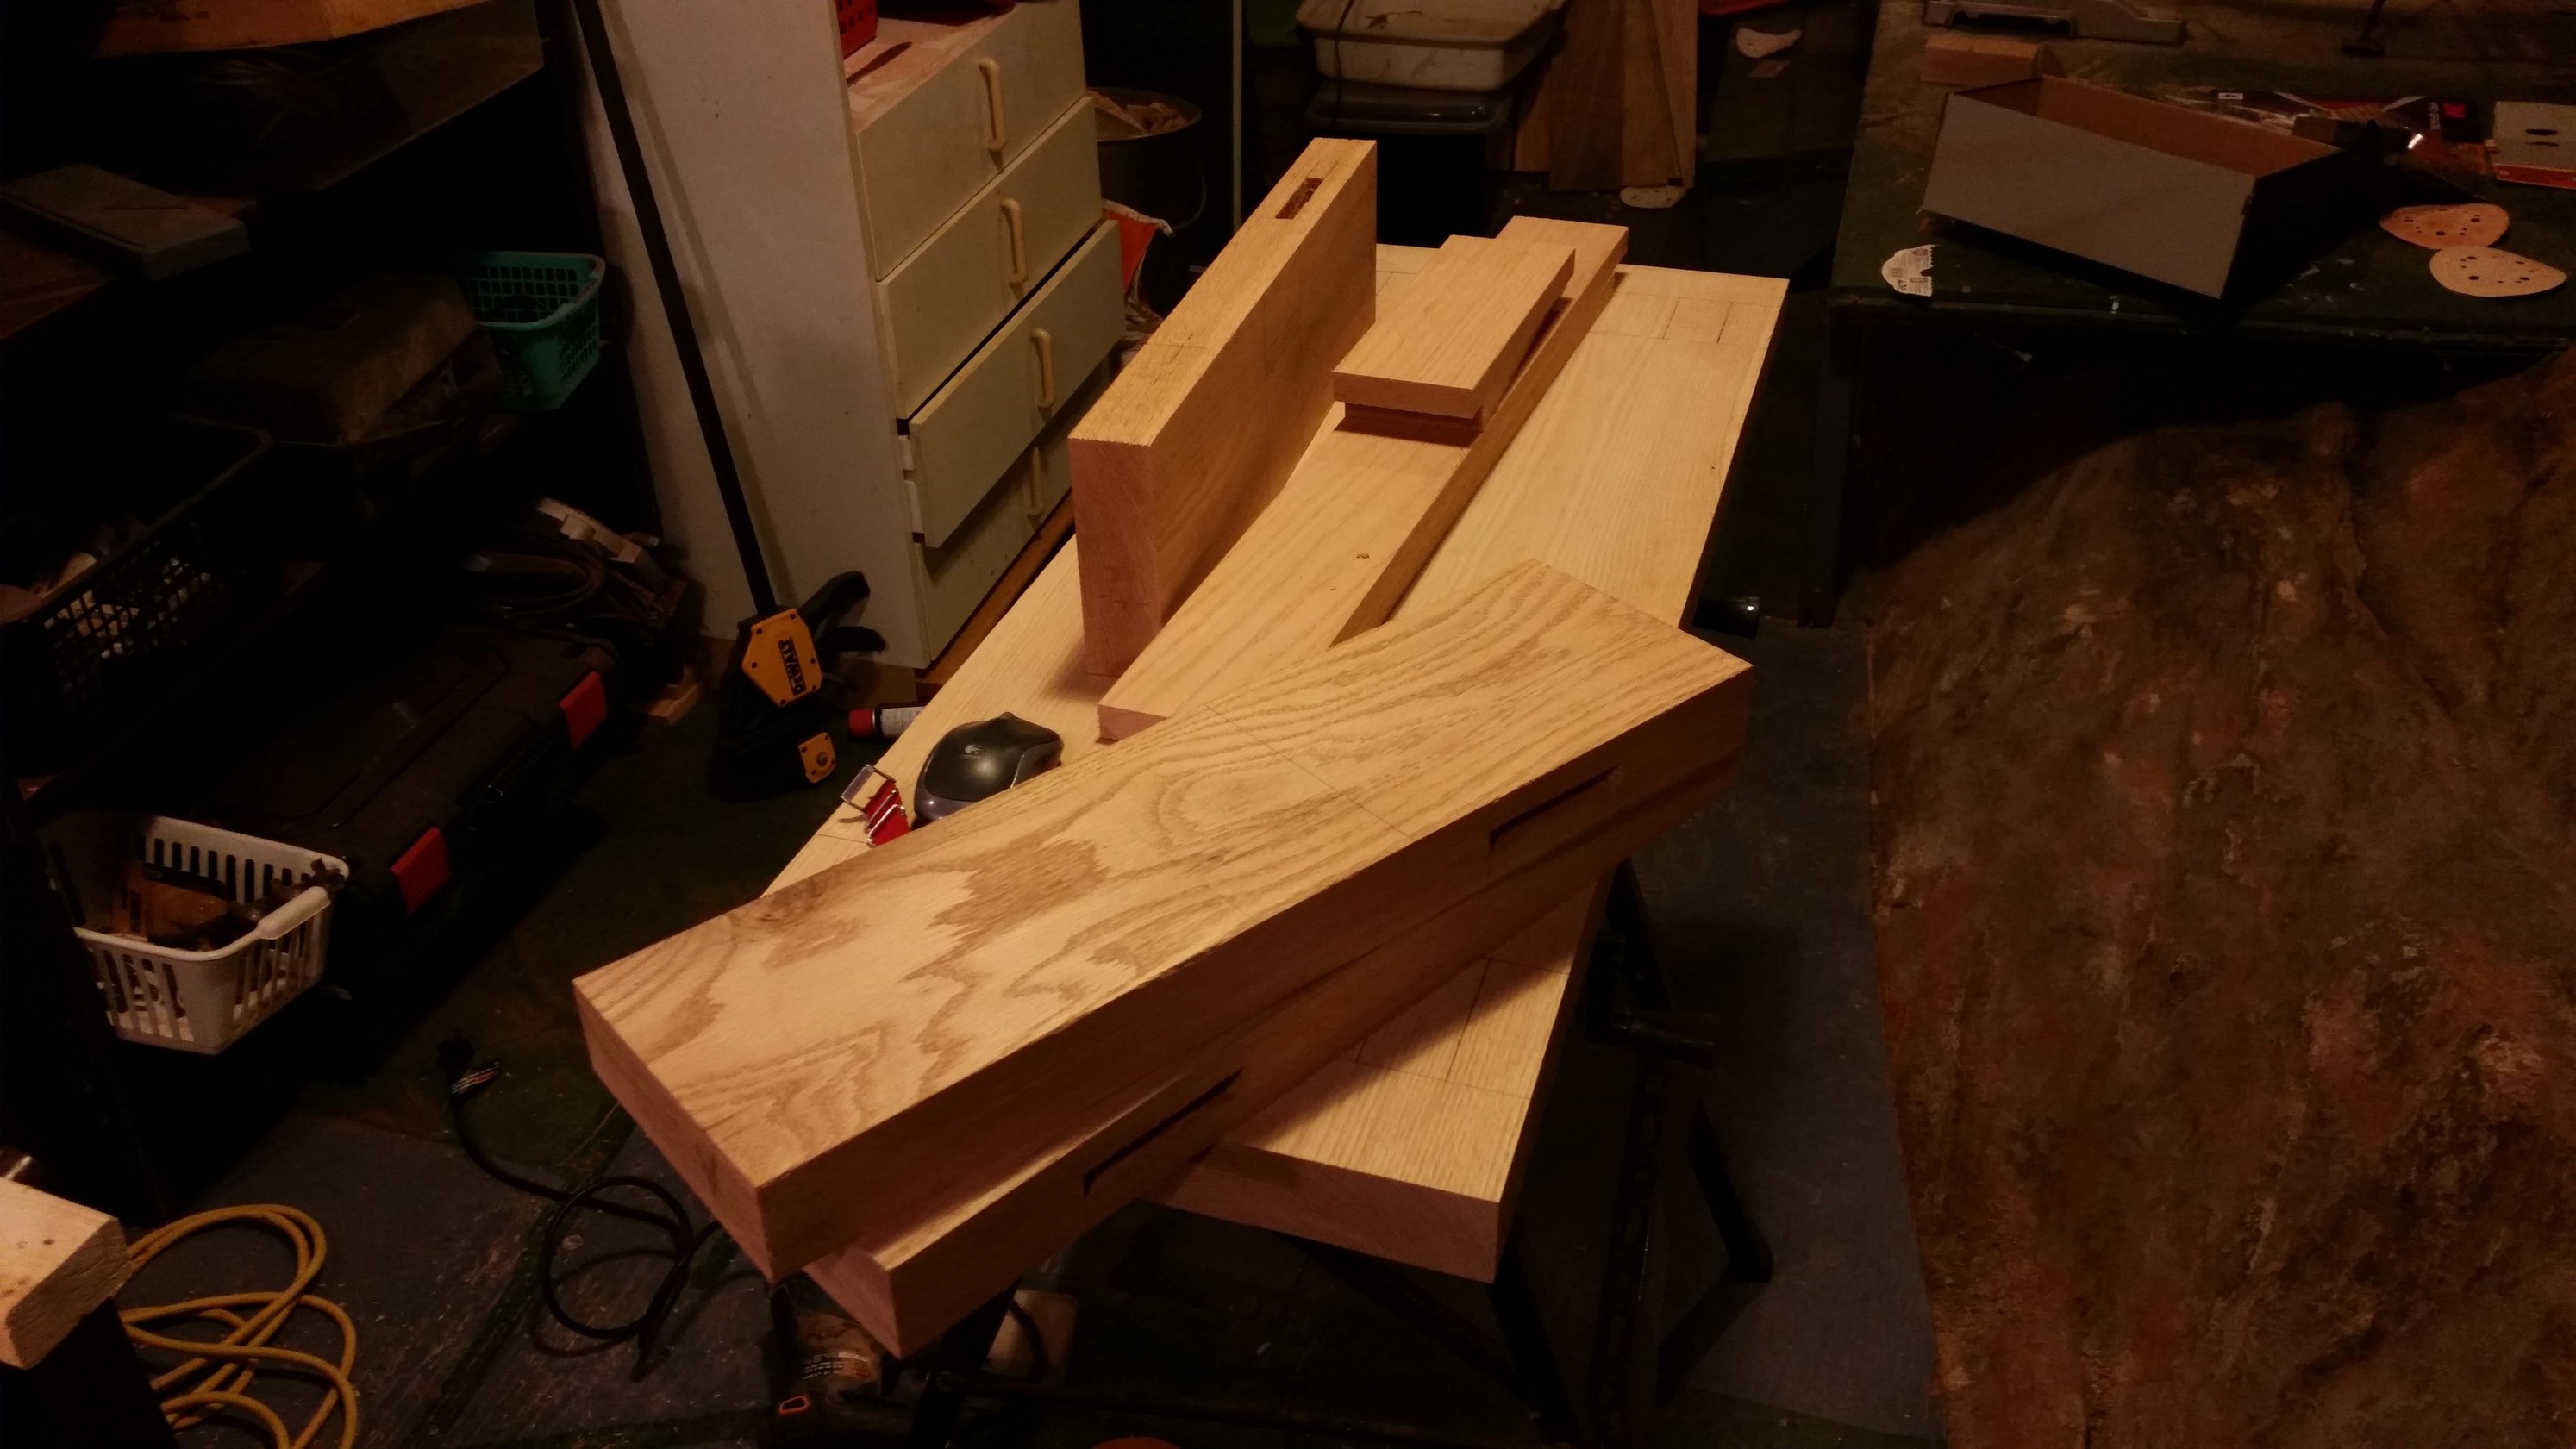
This was time consuming and difficult, especially for the larger mortices on the seat. These were for through-tenons, so the result would be on display on the seat of the bench. We made some gnarly edges in some places.
Next, the tenons. We did this on the table saw, using a dado. We threw together a table saw sled for this part, and it was very helpful. I can't believe we didn't have a sled before this. We put together a 1/2" dado stack and clamped a stop for the tenon length. We ran the ends of the stretchers and legs over the dado for a few passes, until we reached the stop. The length was 3/4" for the stretcher tenons and just over 1 3/4" for the legs, so that they would barely emerge from the top of the seat. After sanding them to fit, they were looking pretty handsome.
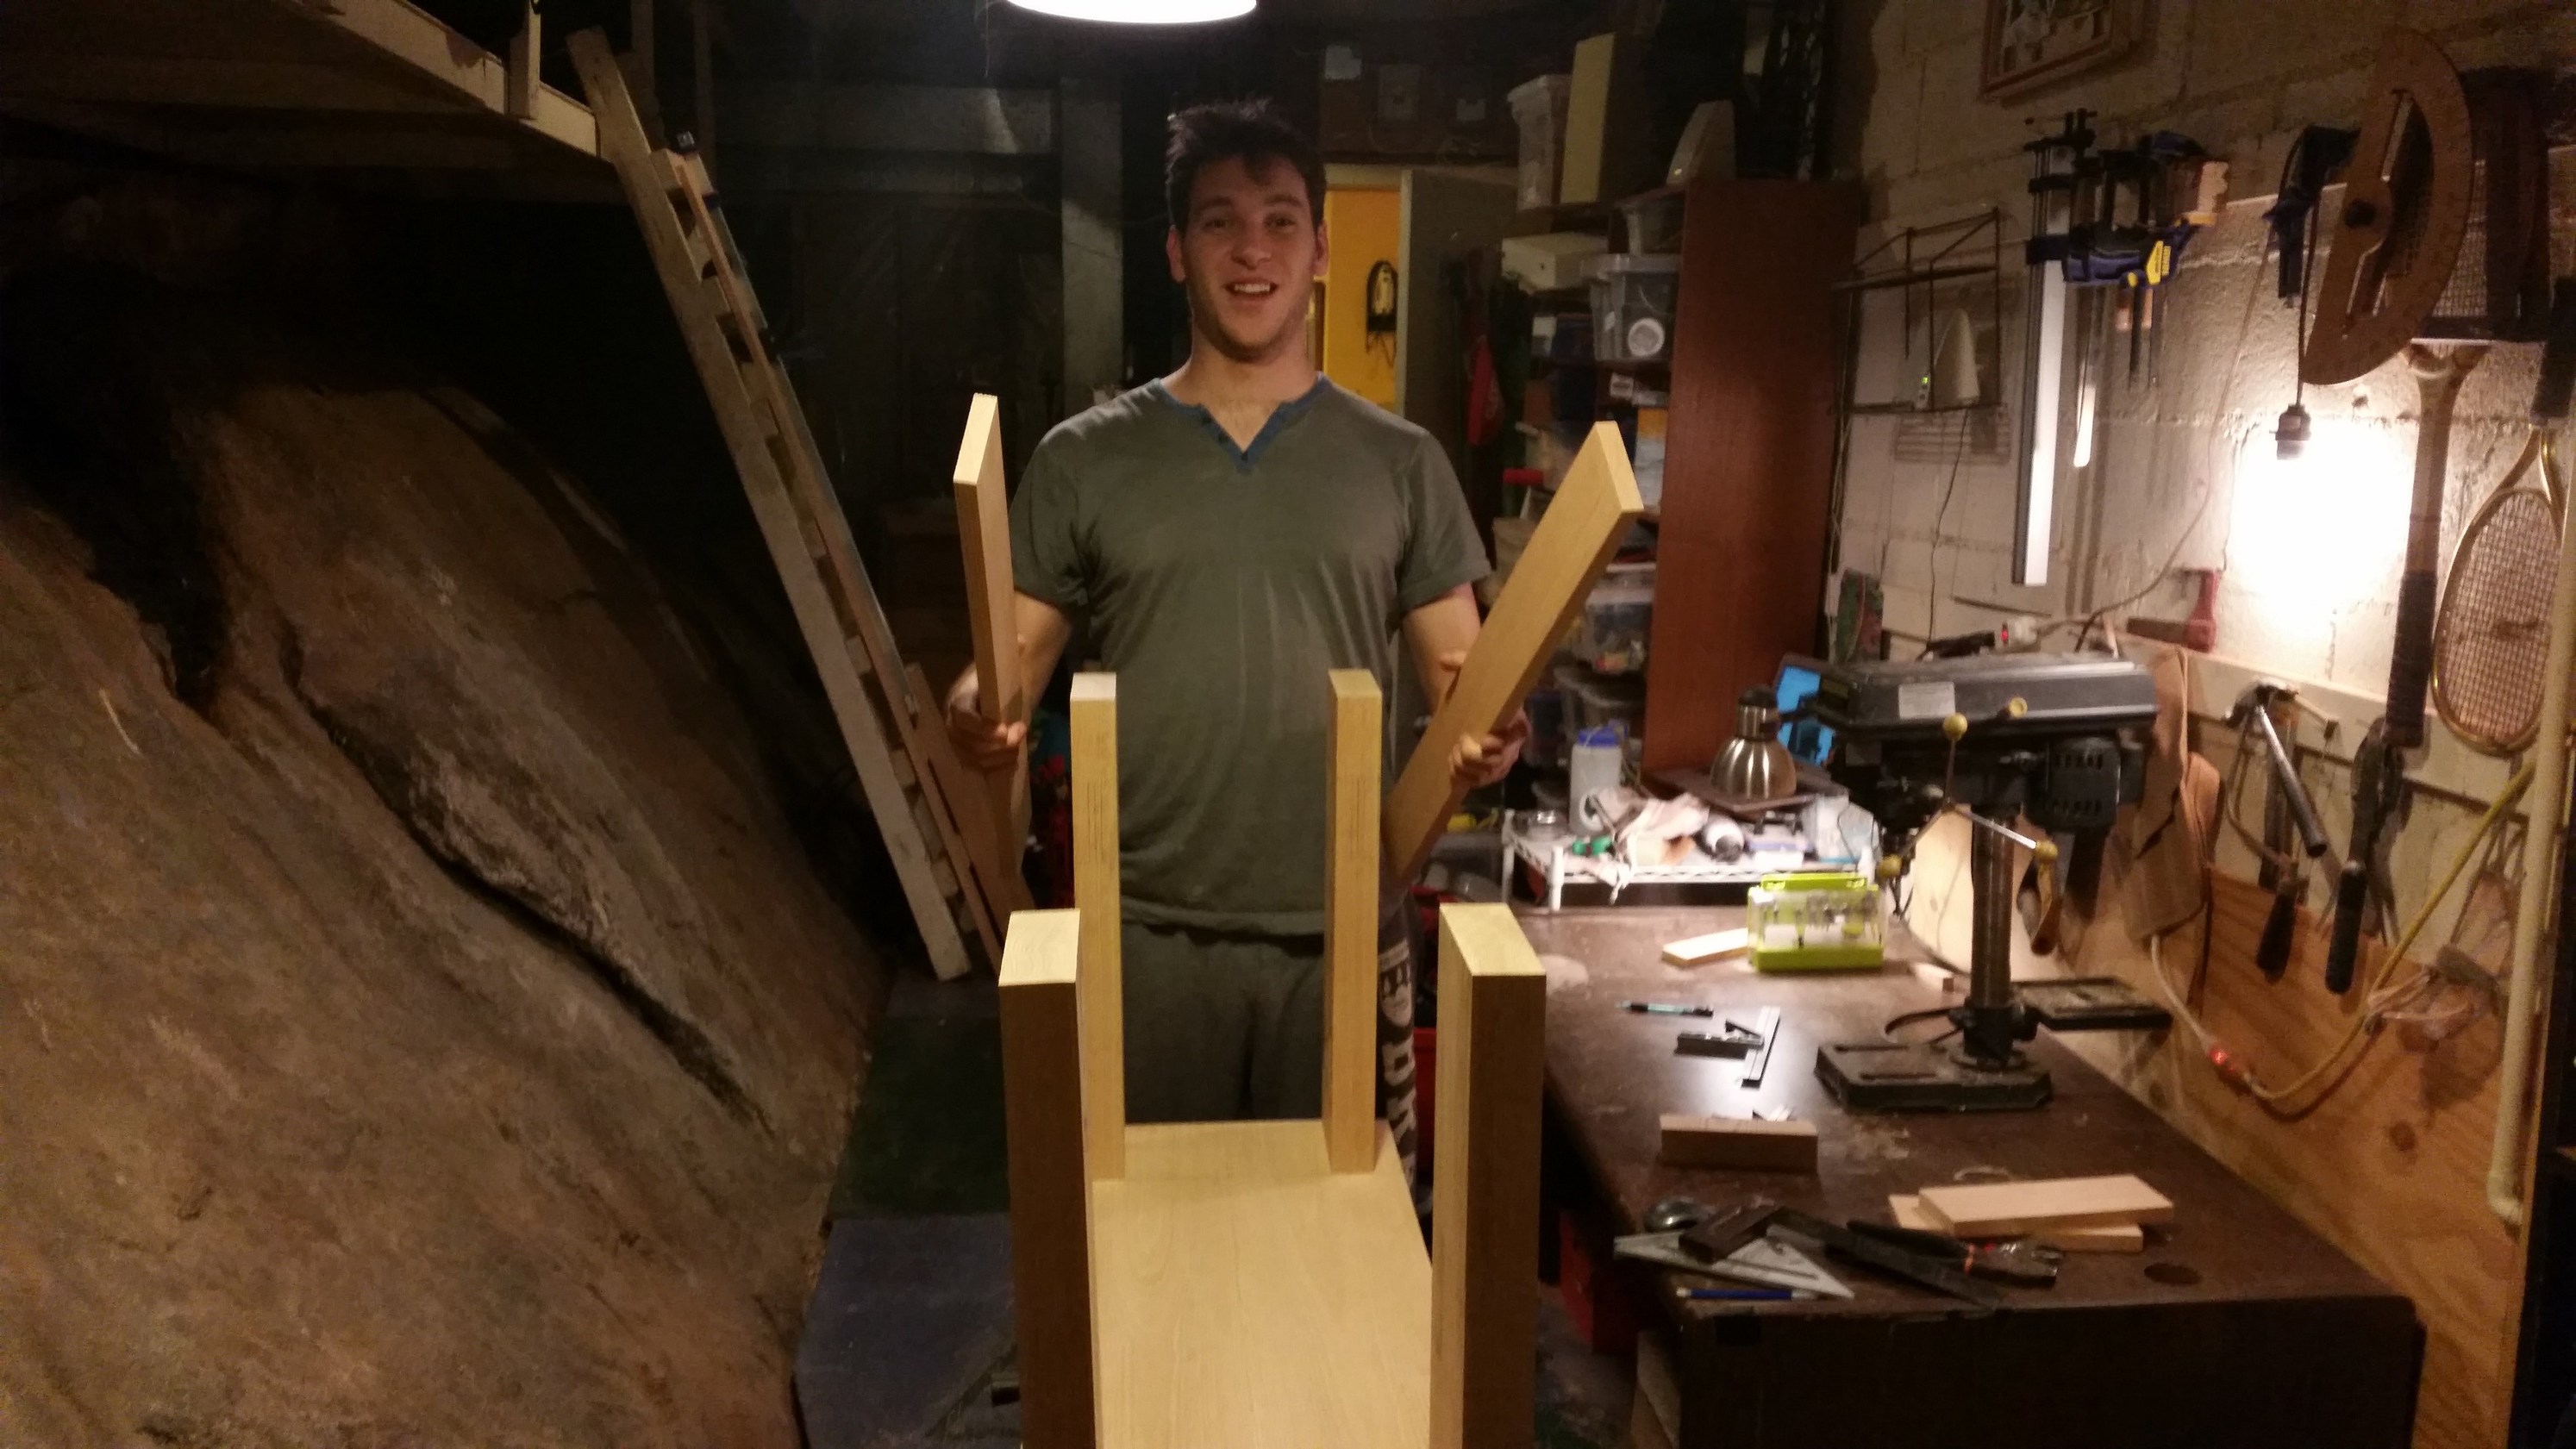
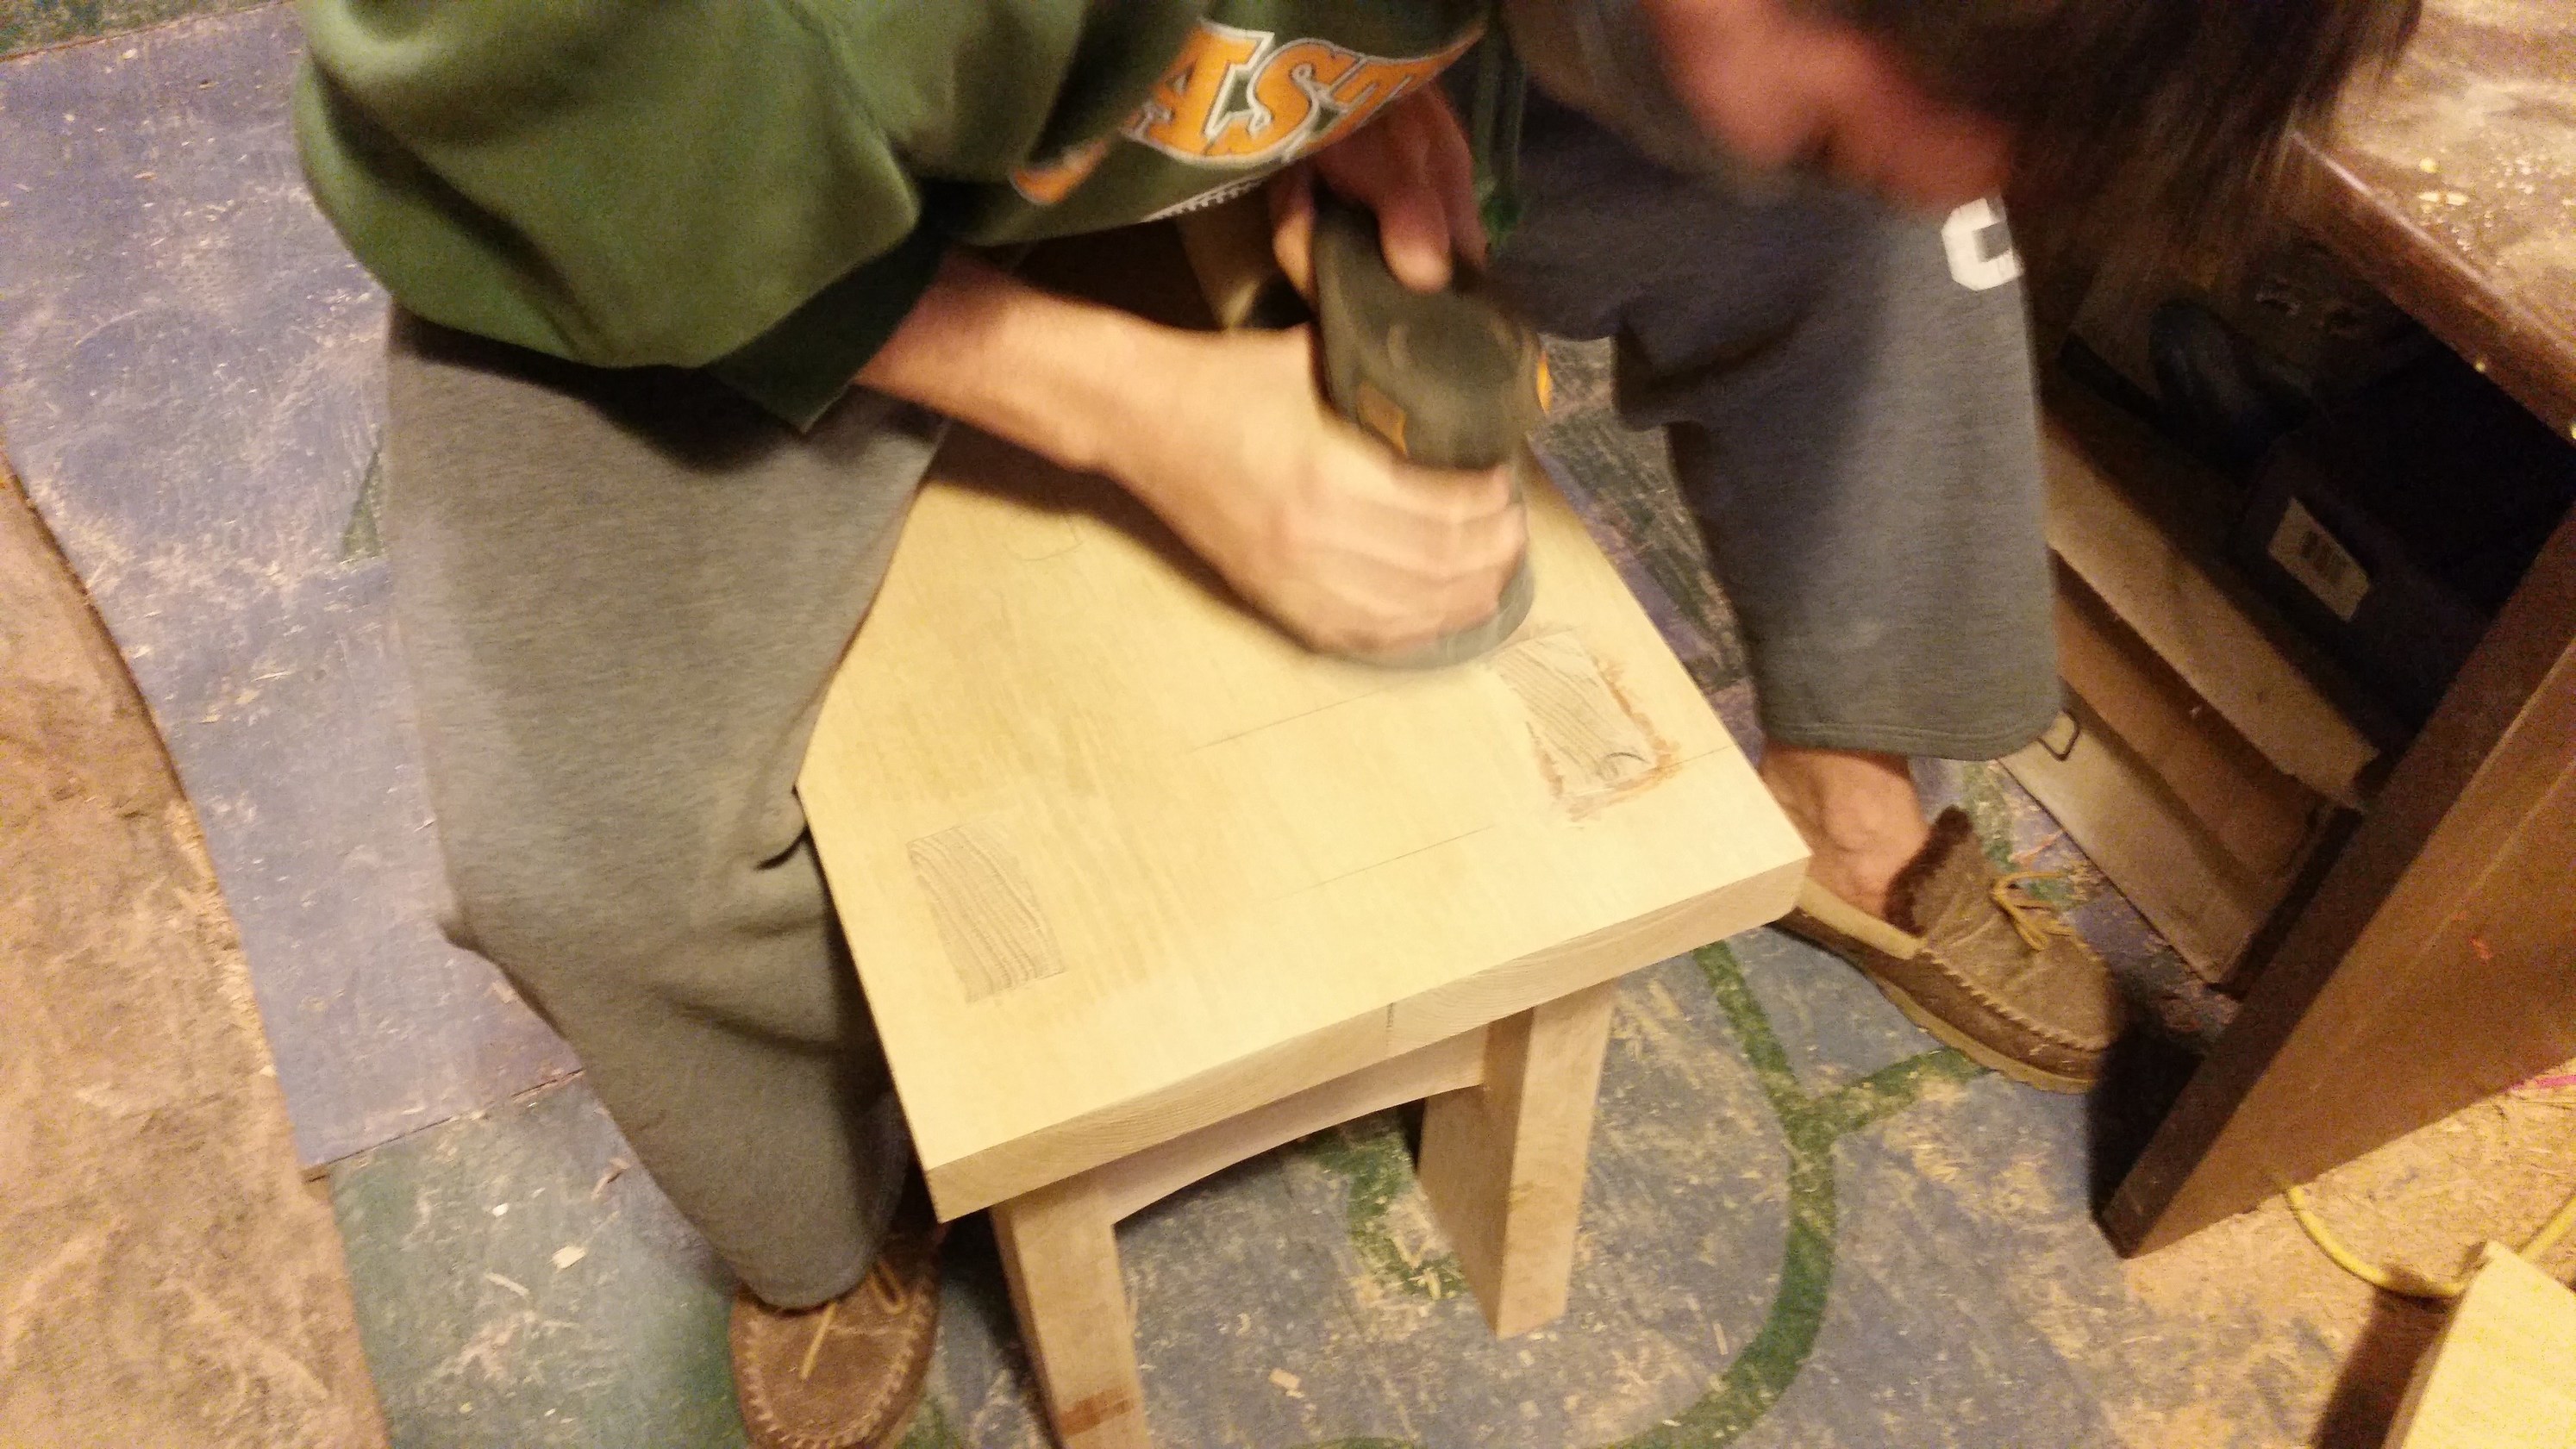
We weren't exactly sure how we would cut the curves into the stretchers and legs. We marked the curves very approximately according to the plan. We traced the small stretcher curves with a 24" drum head. Luckily it had exactly the right radius for our design. For the long stretchers and legs, we didn't have any enormous circles on hand so we just bent a thin piece of wood and clamped it in place.
We didn't have access to a band saw, and we were worried that we'd mess it up with the jig saw. There was no other option, though. The curves looked only a little horrible immediately after cutting, and way better after some fine tuning with the palm sander. Now we had all the pieces ready.
Gluing everything together was almost a disaster. We carefully fit every tenon to its matching mortice with chisels and sand paper, but when we started gluing we realized we had done it wrong and commited to an impossible orientation. We pressed ahead, hoping everything would fit, but the glue started setting and some of the tenons felt stuck half way in. I thought we were doomed. There were some moments of "Oh god, what do we...?! Just hit it! Is it fitting? Just hit it keep hitting it!". After five minutes of terror and dozens of strikes with the mallet, the bench made it together. Somehow, it was square everywhere.
We filled the shameful gaps between the mortices and tenon ends on the top of the seat with a mixture of saw dust and wood glue. This seemed to work.

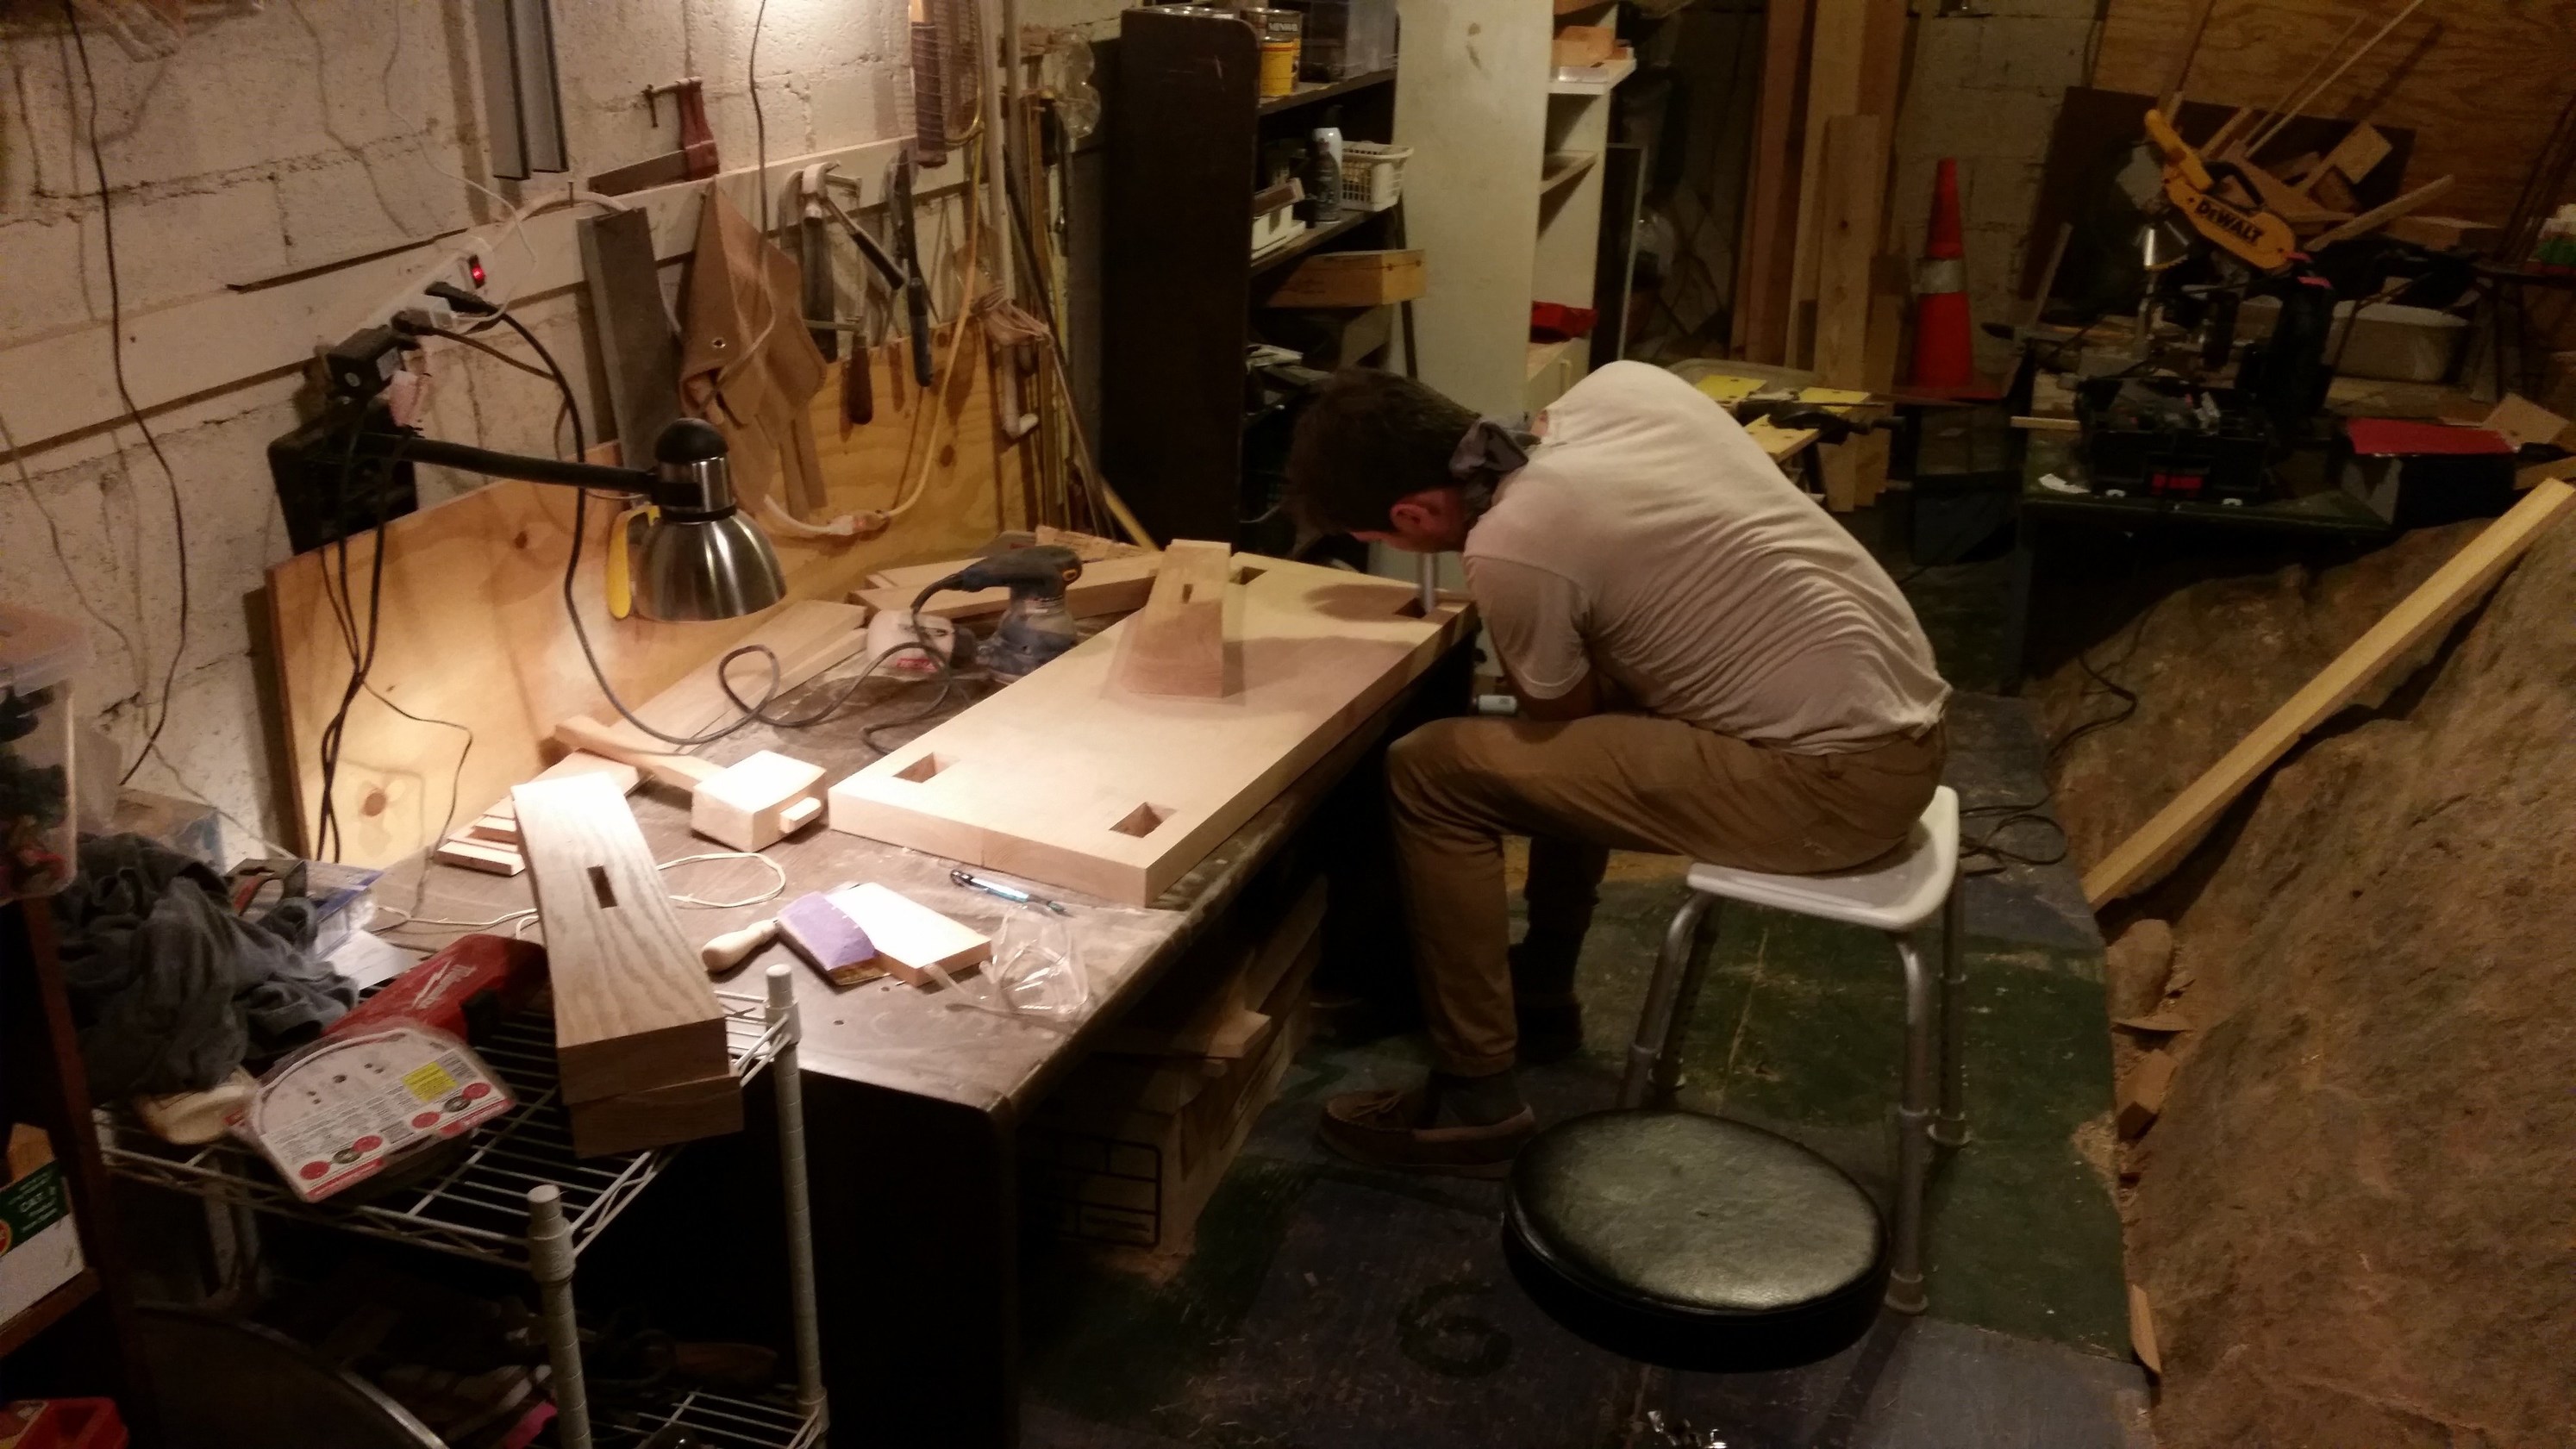
The next morning, we removed the clamps, and sanded away all the glue. On the seat, we sanded almost 1/8" of the ends of the tenons to make them flush. We worked our way to 400 grit on every surface. We tried some weird fine sanding disks called SandNet from the Home Depot, because they looked fun. It's some kind mesh material made from ancient elven fibers. The pack says it lasts longer because you can wash the sawdust out of it. Instead, they seemed to get ripped up immediately by the sander. I don't know.
Finally, we applied two coats of finishing wax.
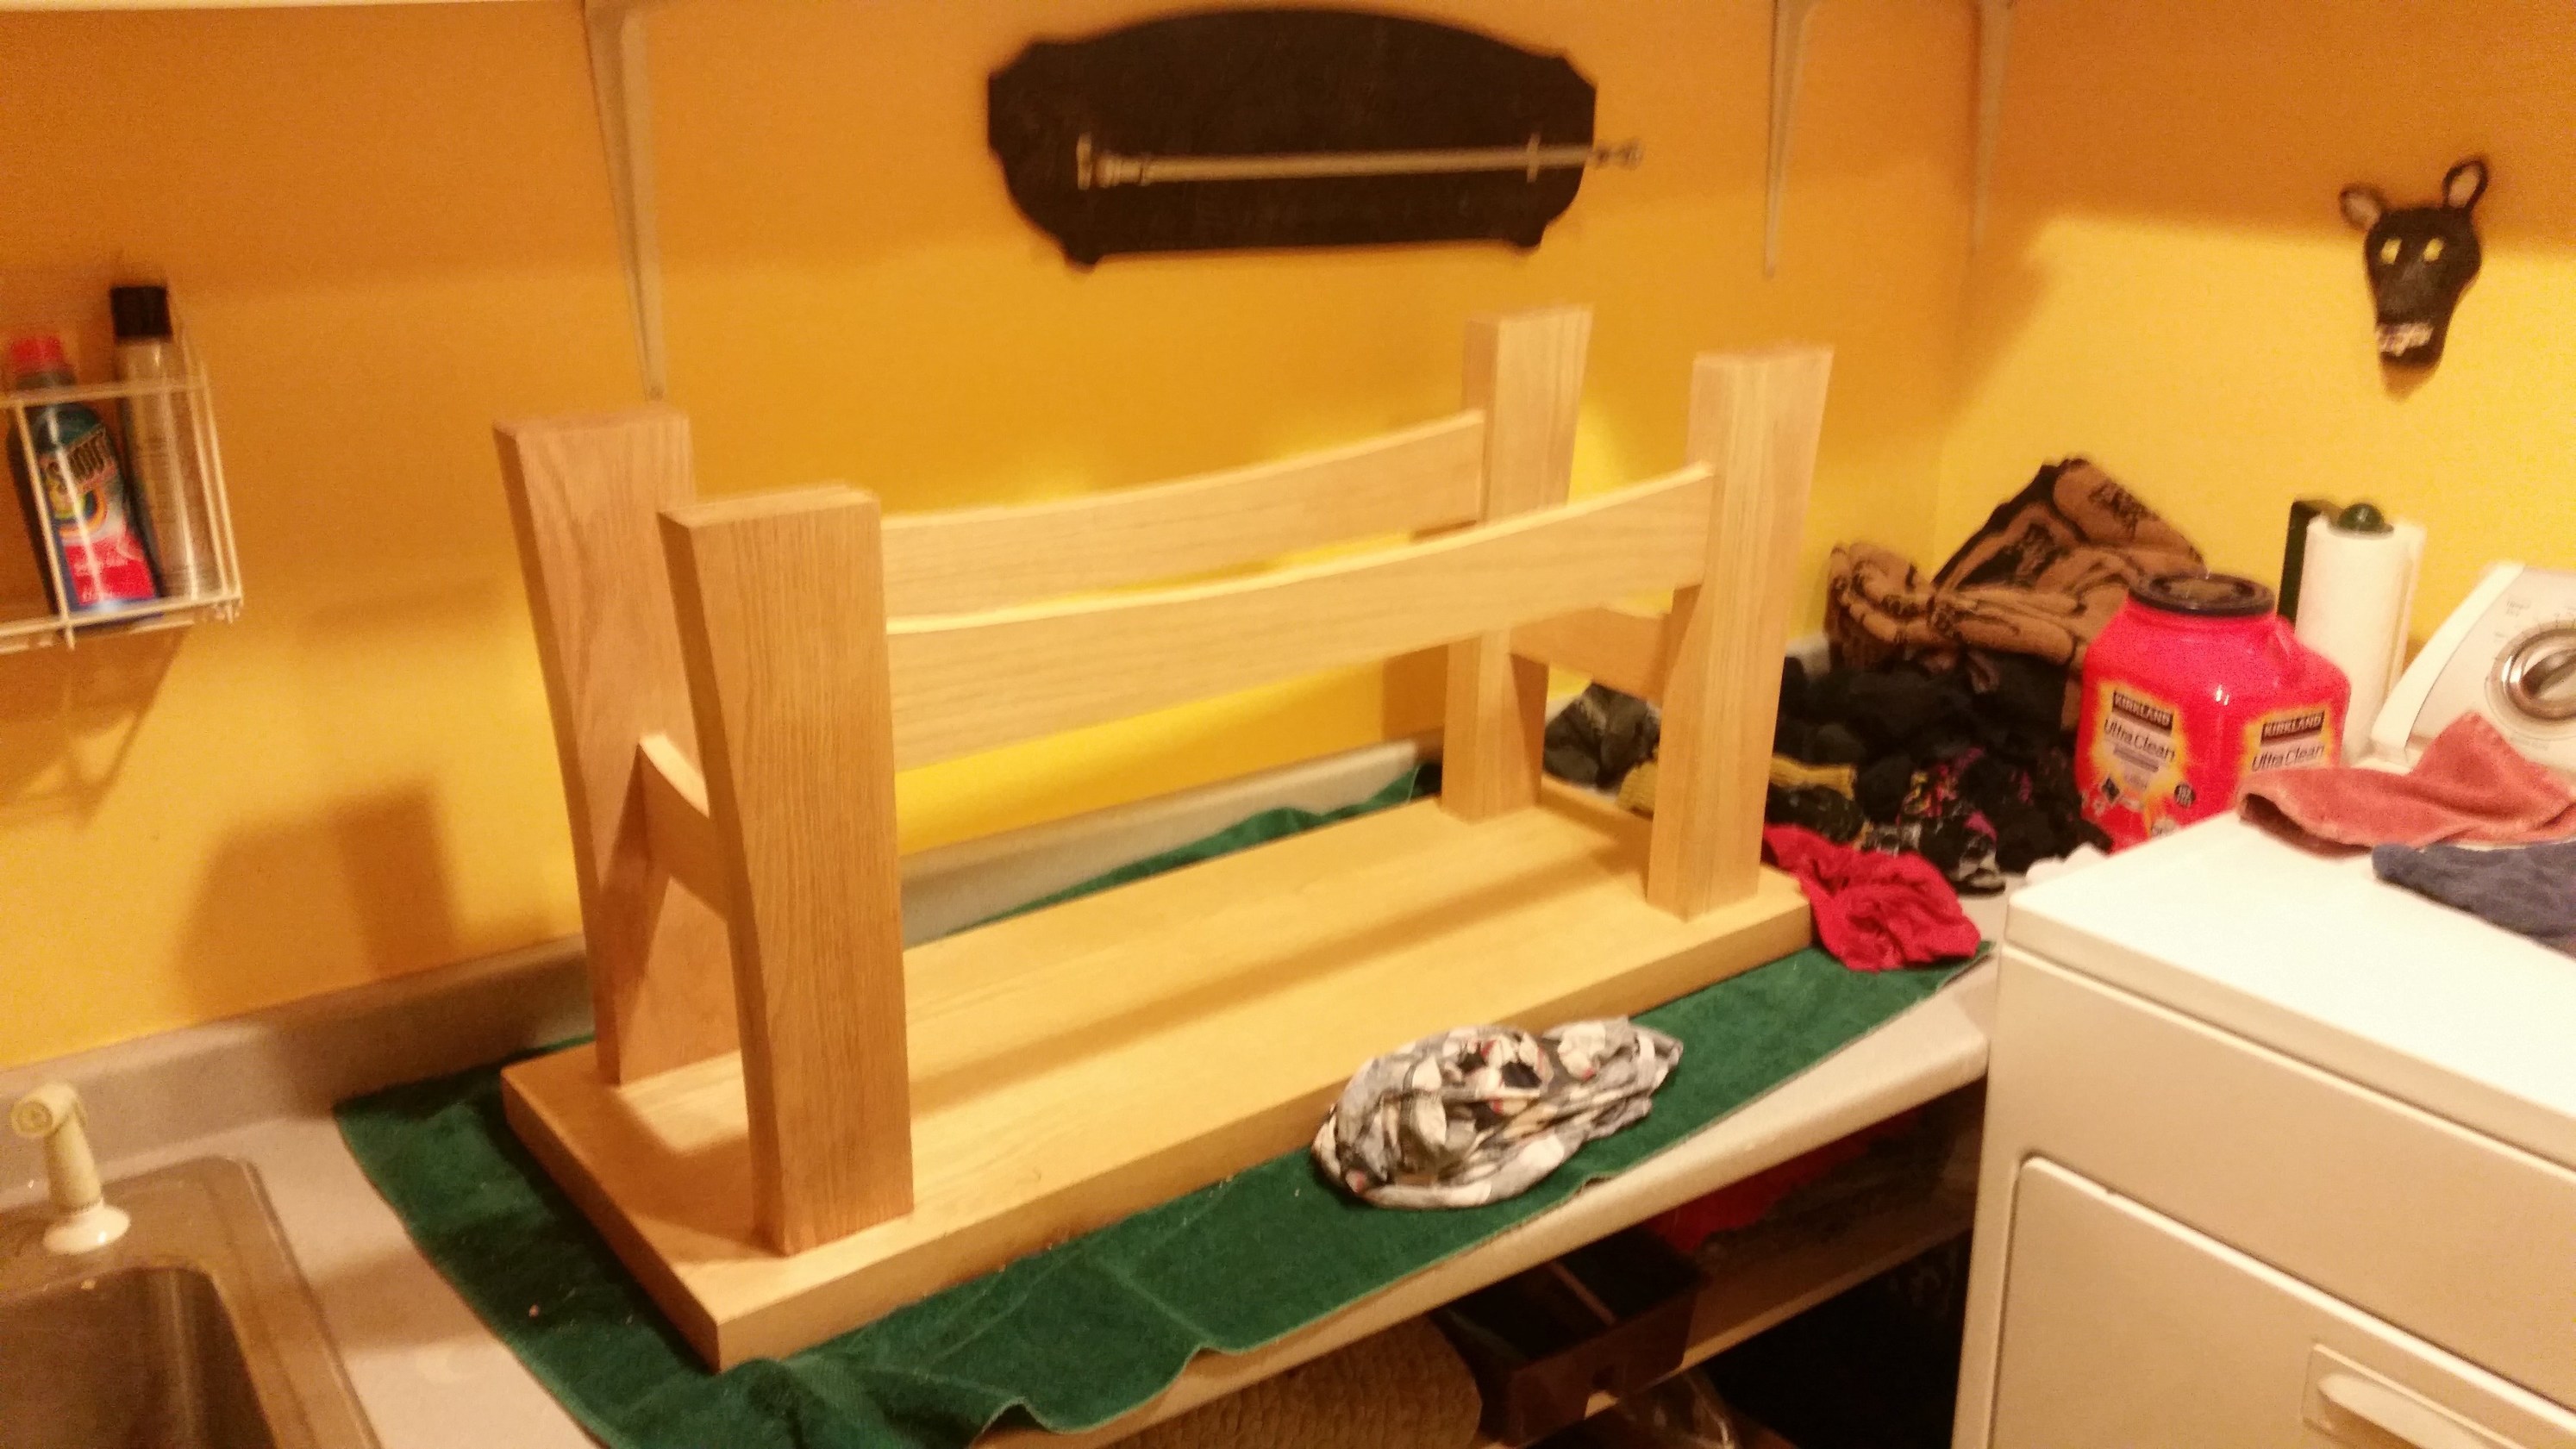
Here's the finished product. It turned out to be very heavy and sturdy. Hopefully no one ever has to move it.