You've Reached the Center of the Internet
It's a blog
Marble Mirror Update
We’ve made a lot of progress since my first marble machine post!
Major Changes
Here’s an overview of the main changes we made since my last post.
Smaller, Better Marbles
Most obviously, we’ve switched from 3/8” stainless steel balls to 6mm ABS beads. I was skeptical at first, but I now see that this is better for a number of reasons.
Why was I skeptical? I thought that small plastic beads would be too light and would get stuck in the machine, either by static charge or by just not having enough inertia to roll when necessary. Steel ball bearings are sold as machine parts and can be bought with tight tolerances. We were able to get two colors by oxidizing the steel with chemicals. The only plastic balls we could find that came in multiple colors were sold as art supplies or decoration. I thought this would mean they were inconsistent or not perfectly round. This has not been a problem at all. The balls are actually easier to move around by virtue of being lighter. The black and white beads have much better contrast than the oxidized and unoxidized ball bearings.
We’re using a product sold as “undrilled beads”.
Fiber Optic Color Sensing
The machine needs to know what color marbles are to be able to place them in the correct column. We do this with an RGB pixel sensor and an LED for illumination. Fitting the LED/sensor module onto the carriage was awkward and an annoying constraint. We solved this by moving the sensor to the side of the carriage and moving light around using PMMA fiber optic cables. One cable illuminates the marble and the other collects light for the sensor. I’m sort of surprised by how well this works.
It looks cool, too.
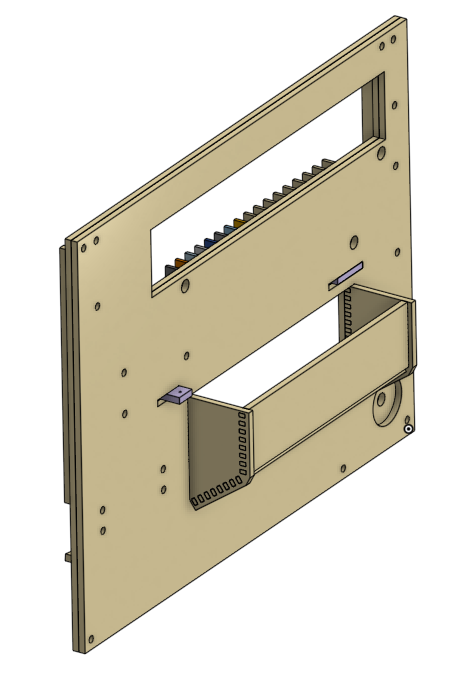
Bucket-Style Reservoir
One issue we’d been grappling with is the size of the ball reservoir. If we want to be able to display all possible images, we need at least enough black marbles to fill the whole screen and an equal number of white marbles. Imagine actually trying to draw a full black image with that configuration, though. The stream of marbles is drawn semi-randomly from the reservoir. Hunting for those last few black marble could take a while. If the reservoir can hold three times the number of marbles in the screen, it will still contain one third black marbles even when the screen is all black. That’s a big reservoir, though.
In previous versions, marbles were completely confined to a single plane. To increase the reservoir size without having it dominate the visible surface, we added a big out-of-plane bucket behind the machine.
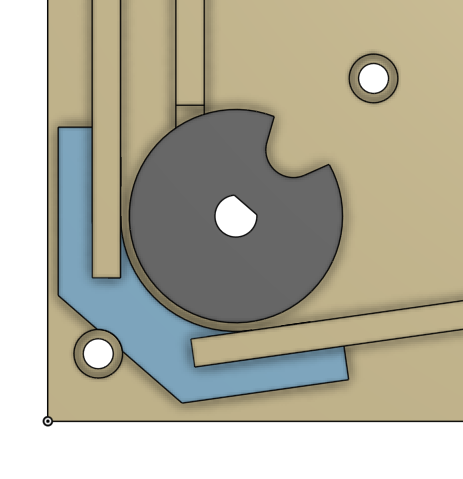
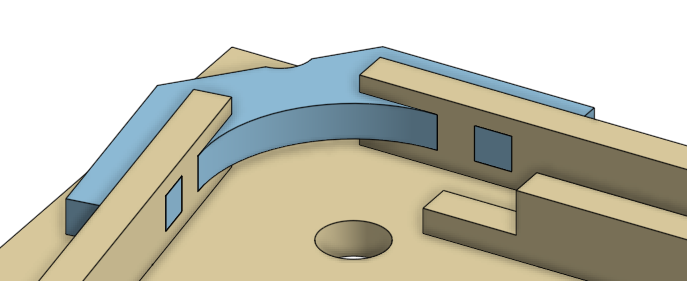
Smoothly-Curved Elevator Channel
We ran into issues with balls binding in the lower-left corner, where a stepper motor lifts marbles to the top of the machine. Previous versions featured a corner with a polygonal wall.
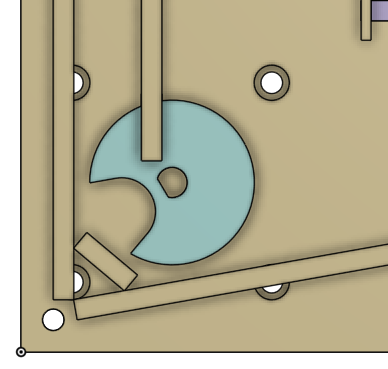 This was a simple design achievable with the laser cutter.
The new version has a smooth corner. Also produced using a laser cutter, but a little less obvious.
Improved Stepper Driver
In earlier versions of the marble machine, we used simple H-bridge style stepper drivers. They essentially just amplify the output of a digital pin. If, like us, you’re using the GPIO pins of a Raspberry Pi to command the driver, these are terrible. The speed that the pins can be controlled at and the consistency of the timing makes the drive speed low and the motor very noisy.
We changed to a proper CNC control board that reads GRBL G-code. Now, instead of directly controlling the state of every pin, the Pi just sends serial commands saying “go to position 10 mm”.
Getting this working was an ordeal, but was totally worth it. We had to fight to get this working, but now that it is the motion of the carriage and elevator is smooth and fast.